In the world of digital marketing, Testing QR Codes before publishing is the most critical step in the deployment process. A single error in design or a broken link can render thousands of printed materials useless, wasting your entire marketing budget. Since these codes act as a bridge between physical and digital media, ensuring that bridge is stable is non-negotiable.
What Does QR Code Testing Mean?
QR code testing is the mandatory quality assurance process used to verify that a code is functional, accurate, and scannable across various devices. This involves checking:
- Decodability: Confirming that hardware can successfully "read" the pattern.
- Data Integrity: Ensuring there are no typos or 404 errors in the URL.
- Environmental Resilience: Verifying the code works in low light or high glare.
- User Experience (UX): Checking that the landing page is mobile-optimized.
Why QR Codes Fail After Publishing
Often, a code that works on a computer screen fails in the real world. Common reasons for post-publishing failure include:
- Link Expiration: For static codes, if a domain expires or a URL changes, the code is permanently broken.
- Environmental Wear: Codes on outdoor signage can fade or peel, exceeding the code's error correction capacity.
- Substrate Issues: Ink on certain materials like recycled paper can "bleed," blurring the sharp edges of the modules.
Risks of Skipping QR Code Testing
Skipping the testing phase is a high-risk gamble. Without a proper QR code campaign testing phase, you face:
- Wasted Marketing Budget: The cost of re-printing thousands of flyers is a total loss.
- Brand Damage: A broken code makes a company look technologically incompetent.
- Loss of Critical Data: If the code is not properly linked to your QR Dada analytics, you lose valuable engagement data.
Key Areas to Test Before Publishing a QR Code
To ensure a readable qr code, you must evaluate these specific areas:
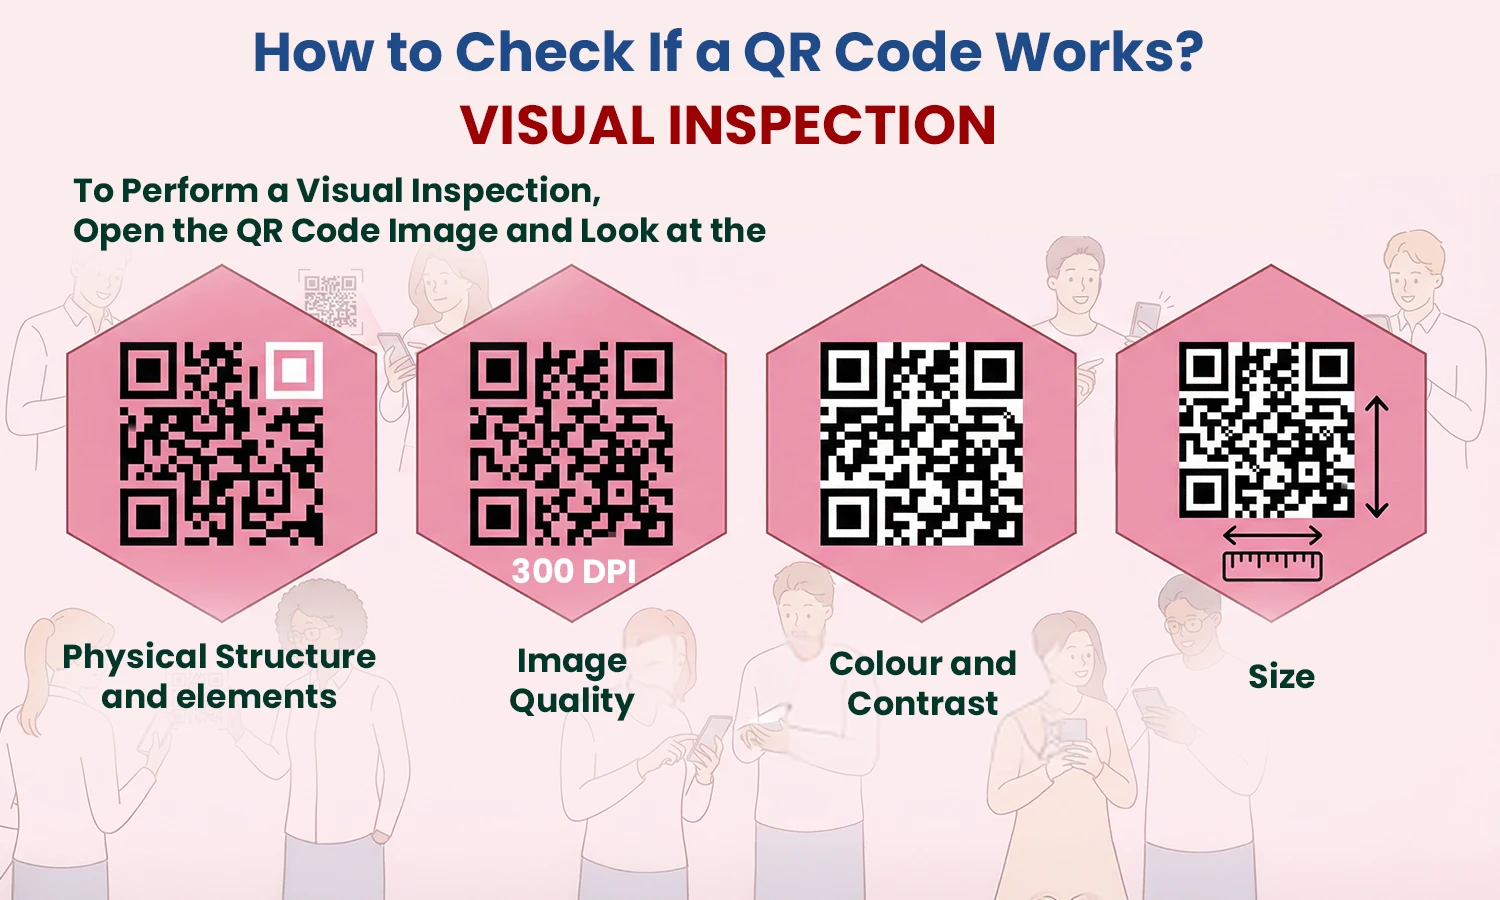
- Hardware Compatibility: Test on both iOS and Android devices.
- The 10:1 Ratio: Ensure the code size is 1/10th of the intended scanning distance.
- Contrast Thresholds: Ensure the foreground is at least 80% darker than the background to avoid QR code scanning issues.
- The 4-Module Buffer: Always maintain a quiet zone (white border) that is at least 4 modules wide.
Testing Static vs Dynamic QR Codes
Testing is your only safety net for static codes. Once the ink is dry, the data is permanent. However, using Dynamic QR Codes from a platform like QR Dada offers a secondary layer of protection. If a test fails after the codes are printed, you can log into the QR Dada dashboard and update the destination URL without needing a reprint. This is one of the top QR code testing best practices.
Real-World QR Code Testing Scenarios
Move beyond your desk and test in the environments where customers will encounter your brand:
- Restaurants: Test codes under dim lighting and on glossy tables where glare is common.
- Billboards: Ensure the code is low-density so a camera can "lock on" from a distance.
- Magazine Ads: Check if the curvature of the page warps the pattern, making it unreadable.
QR Code Testing Checklist (Quick Reference Section)
Use this checklist before sending any design to the printer:
- [ ] Contrast Check: Is the foreground significantly darker than the background?
- [ ] Quiet Zone: Is there a clear 4-module margin on all sides?
- [ ] Resolution: Is the file at least 300 DPI or in a vector format (SVG/EPS)?
- [ ] Device Test: Have you scanned it with both an iPhone and an Android?
- [ ] Destination: Does the link lead to a mobile-friendly page with no typos?
- [ ] Analytics: Does the scan show up in your QR Dada dashboard?
Key Takeaways
- Never publish without a physical test print to check for ink bleed and color shift.
- Testing QR Codes before publishing prevents wasted costs and brand embarrassment.
- Use QR Dada to create dynamic codes that allow for instant post-print corrections.
A readable qr code must follow the 10:1 size ratio and 4-module quiet zone rule.